A day hike can turn into a serious problem after one missed trail junction, a dead phone, or a patch of fog. This guide explains a practical three-part system: a paper map for the big picture, a compass for direction, and an offline phone map for quick checks. No state law is discussed here. This is not legal advice — consult a licensed attorney.
Why a Paper Map Still Matters on a Day Hike
A paper map should lead your navigation plan because it does not need a battery, signal, subscription, or touchscreen. A phone is fast, but a map shows the wider terrain: ridgelines, streams, roads, saddles, cliffs, and alternate routes. That wider view helps you make a sound decision before a small mistake becomes a long detour.
What a topographic map tells you
Contour lines show changes in elevation. Lines packed tightly together mark a steep slope; lines spread far apart show gentler ground. A V-shaped contour pattern often points uphill along a drainage, while a rounded closed loop may mark a hilltop. Before leaving, identify the trailhead, your intended route, the highest point, every major junction, and at least one exit route.
Use the map scale to estimate distance, then add time for elevation. A flat 3-mile trail may take about 90 minutes for a steady walker. A 3-mile route with 1,500 feet of climbing can take twice as long, especially on loose or wet ground.
Why route memory is not enough
Many hikers remember a trail as a sequence of turns: left at the bridge, right after the open field, then uphill. That method fails when the bridge has several crossings or the field is hidden by snow, leaves, or low light. Mark recognizable terrain features instead. A saddle, stream junction, sharp bend, or spur ridge gives you a location you can verify from more than one direction.
The clear verdict is simple: carry a printed map for any route where a wrong turn could add significant distance, elevation, or exposure.
How to Read a Hiking Map Before You Leave
Preparation takes about ten minutes and removes much of the guesswork from the trail. Follow this sequence before starting the walk.
- Confirm the map date and coverage. Check that the map includes the entire route, the trailhead road, nearby junctions, and a margin beyond your planned turnaround point.
- Match the map to the ground. Identify north, then compare the map with visible ridges, valleys, roads, and prominent peaks. Do not assume the map is oriented correctly if it is folded.
- Mark decision points. Circle every junction, creek crossing, switchback area, and place where an unofficial path could look like the main trail.
- Estimate time by sections. Break the route into short legs. Record the expected time for each leg rather than relying on one total distance.
- Set a turnaround rule. Choose a time or location that ends the hike, even if the destination is not reached. A firm rule prevents late-day pressure from causing poor decisions.
How to use contour lines in practice
Suppose the trail crosses five contour intervals before reaching a ridge. If each interval represents 40 feet, the climb is roughly 200 feet. The map will not show every root, rock, or slippery patch, so treat the elevation figure as a planning estimate rather than a promise. A route that looks short on paper may still be slow if it crosses talus, mud, or dense vegetation.
How to set a compass bearing
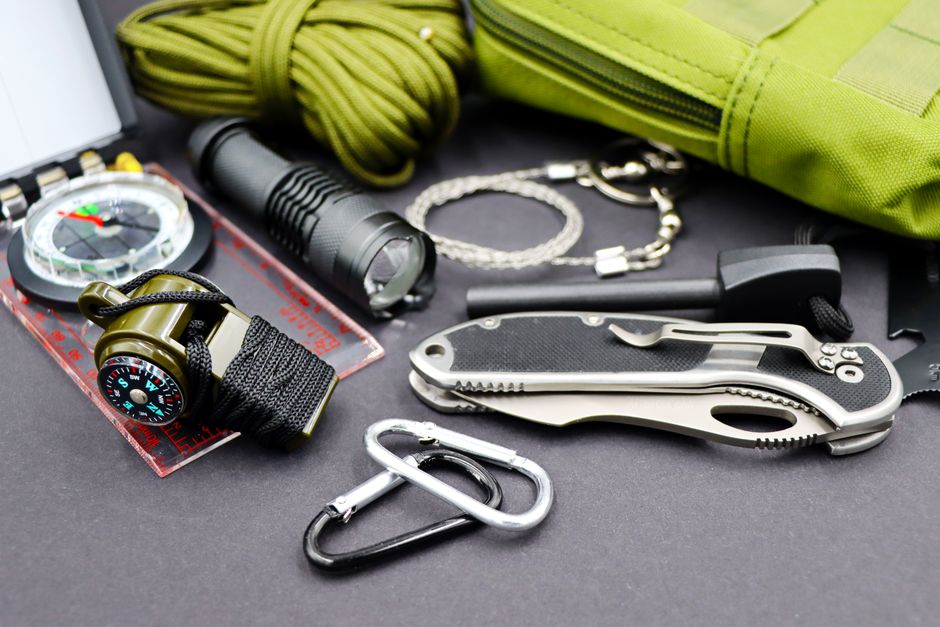
Place the compass edge between your current location and the destination. Rotate the housing until its orienting lines match the map’s north-south grid. Read the bearing, then account for magnetic declination if the map provides it. On the trail, hold the compass level, turn your body until the needle matches the orienting arrow, and select a visible landmark in that direction. Walk to that landmark, then repeat. This keeps you on course without staring at the needle every second.
Practice this process in a park before using it on a remote trail. A compass only gives reliable direction when you know how to relate the bearing to the landscape.
Map, Compass, or Phone: Which Tool Should Lead?
The best setup is not one device. It is a layered system in which each tool covers another tool’s weakness. For ordinary day walks, a paper map and a simple baseplate compass should lead; an offline phone map should confirm position and route details.
| Tool | Best use | Main weakness | Clear verdict |
|---|---|---|---|
| Printed topographic map | Planning terrain, alternate routes, and escape options | Needs preparation and protection from rain | Best primary planning tool |
| Silva Ranger 2.0 | Taking bearings and checking direction | It cannot show your location by itself | Best simple compass for regular day hikers |
| Suunto MC-2 | Mirror-assisted bearings and longer routes | More features require practice | Best for hikers who already use bearings |
| Gaia GPS Premium | Offline route lines, location checks, and downloaded maps | Phone battery, weather, and user error can end access | Best digital backup when downloaded before departure |
| Garmin inReach Mini 2 | Satellite messaging and emergency communication | Requires a clear sky view, account, and plan | Best communication backup in remote country |
Why the phone should not be your only tool
Offline maps are useful only if the map area was downloaded, the route was saved correctly, and the phone still has power. Cold weather can reduce battery life. Water can damage a phone. A cracked screen or poor signal can leave you without the information you expected. A phone also encourages frequent location checks that can distract from terrain.
When a satellite communicator is unnecessary
Most short walks near roads, towns, and busy trail networks do not require a Garmin inReach Mini 2. A paper map, compass, charged phone, and shared itinerary are usually enough. The inReach becomes a strong choice when the route is remote, solo, outside reliable cellular coverage, or exposed to weather delays. It improves communication; it does not replace route knowledge.
What Fails When Navigation Goes Wrong

Navigation errors rarely begin with a dramatic mistake. They usually start with a small assumption: the visible path must be the marked trail, the phone battery will last, or the junction will be obvious. Several small errors can combine before a hiker realizes the route has changed.
The wrong trail junction
Unofficial paths often look more inviting than the correct route because people have worn them into the ground. At every junction, stop and compare the landscape with the map. Check the direction of travel, not just the shape of the path. If the trail should cross a stream within the next few minutes but the route climbs steadily instead, stop and reassess.
The dead battery problem
Using a phone for photos, music, navigation, and messages can consume power quickly. Start with a full charge, switch off unnecessary radios, reduce screen brightness, and carry a small power bank in a waterproof pouch. Keep the phone warm in cold weather. Download maps before leaving coverage, then test them in airplane mode so you know the saved route actually works.
The late-turnaround trap
A hiker who misses a turn may keep walking because the next junction seems close. That choice can turn a ten-minute error into an hour of extra distance. Use a simple rule: if the terrain does not match the map after five minutes of uncertain travel, stop, return to the last confirmed point, and restart the route check. Do not continue forward just to avoid admitting that the route is unclear.
Other common failures include carrying a map without a protective case, keeping the compass near magnetic metal, confusing true north with magnetic north, and trusting a route line that crosses private land or a closed trail. Navigation is a verification task, not a test of confidence.
Questions Hikers Ask Before Using a Phone Backup
Can I hike with only an offline phone map?
You can on a short, well-marked route near help, but it is a weak plan for remote or unfamiliar terrain. An offline app such as Gaia GPS Premium can show a saved route and your approximate position without cellular service. It cannot prevent a dead battery, broken phone, or incorrect download. Carry a printed map and compass when a wrong turn could create a serious delay.
Should I follow the blue route line on my screen?
Not automatically. A route line may reflect an old track, a private road, an unofficial path, or a map error. Use it as one piece of evidence. Confirm the line against signs, trail markers, contour patterns, water crossings, and the direction of surrounding ridges. The map, terrain, and compass should tell the same story before you continue.
What is the safest basic setup for a day walk?
For most day hikers, the winning setup is a printed topographic map, a working baseplate compass, a fully charged phone with the route saved offline, and a trusted person who knows the itinerary and expected return time. Add a Garmin inReach Mini 2 when the route is remote or cellular coverage is unreliable. The single most important takeaway is to use your phone as a backup layer, while the map, compass, and route plan remain the foundation.